

The Problem:
Although you are happy with using Siri to control your Apple Home and you use scheduled automations to control smart devices with the Apple Home app, you wish there was an easy way to add “smart buttons” for manual control. This could be especially useful for your spouse or an elderly parent.
You have investigated smart buttons but found that they need an additional hub. You have seen my article on wall switches that don’t require an additional hub, but you are looking for switches that can be placed on a table. This can be handy on an easy chair side table, or a bedside table.
The Solution:
If your Apple Home Hub is a HomePod mini, HomePod gen 2 (model A2825), or an Apple TV (models A2169 or A2843), it already supports Thread, which is the needed hub for smart buttons.
Thread-based smart buttons from arre or Onvis can directly connect to your Apple Home Hub without using the usual additional hub that smart buttons require.
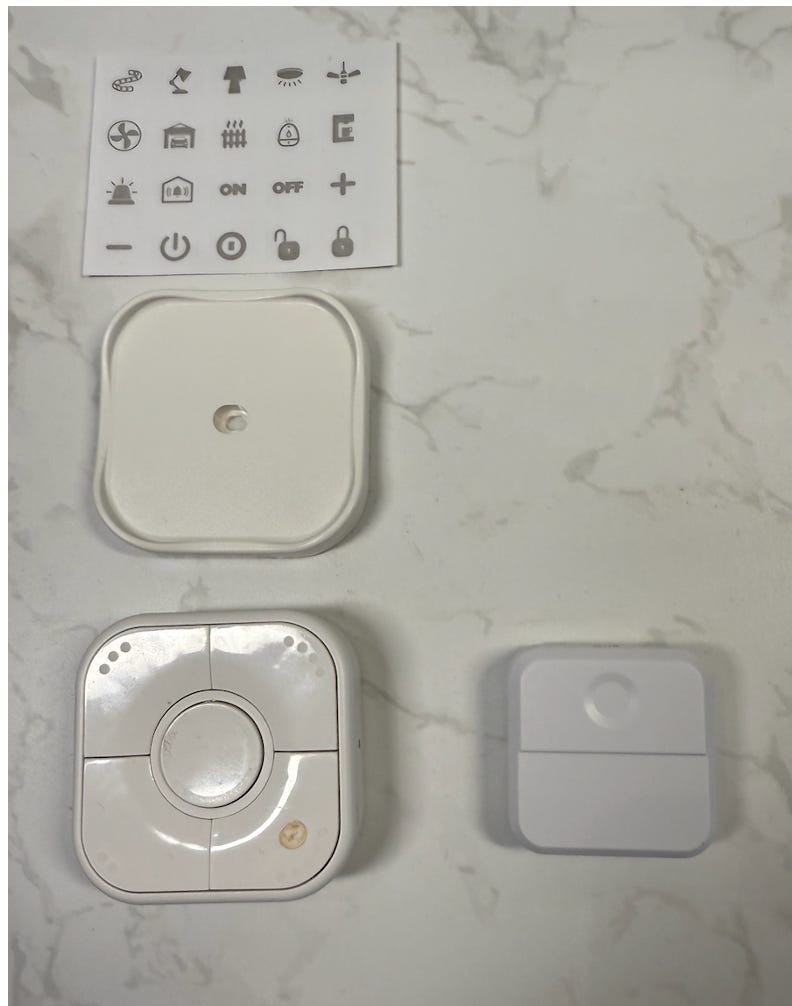
The arre smart button is a single-button device that supports single, double, and long press actions. It also includes a magnetic backing and a wall mount plate.
The Onvis smart button supports the same actions as the arre smart button but has five buttons and adds stickers. These extra buttons can be useful if placed on a chair side table or a bedside table to control different lights.
In addition, HomeKit supports converting a button action to a “Shortcut” so that you can create “toggle” actions, which is great for smart lights and smart plugs.
The Setup:
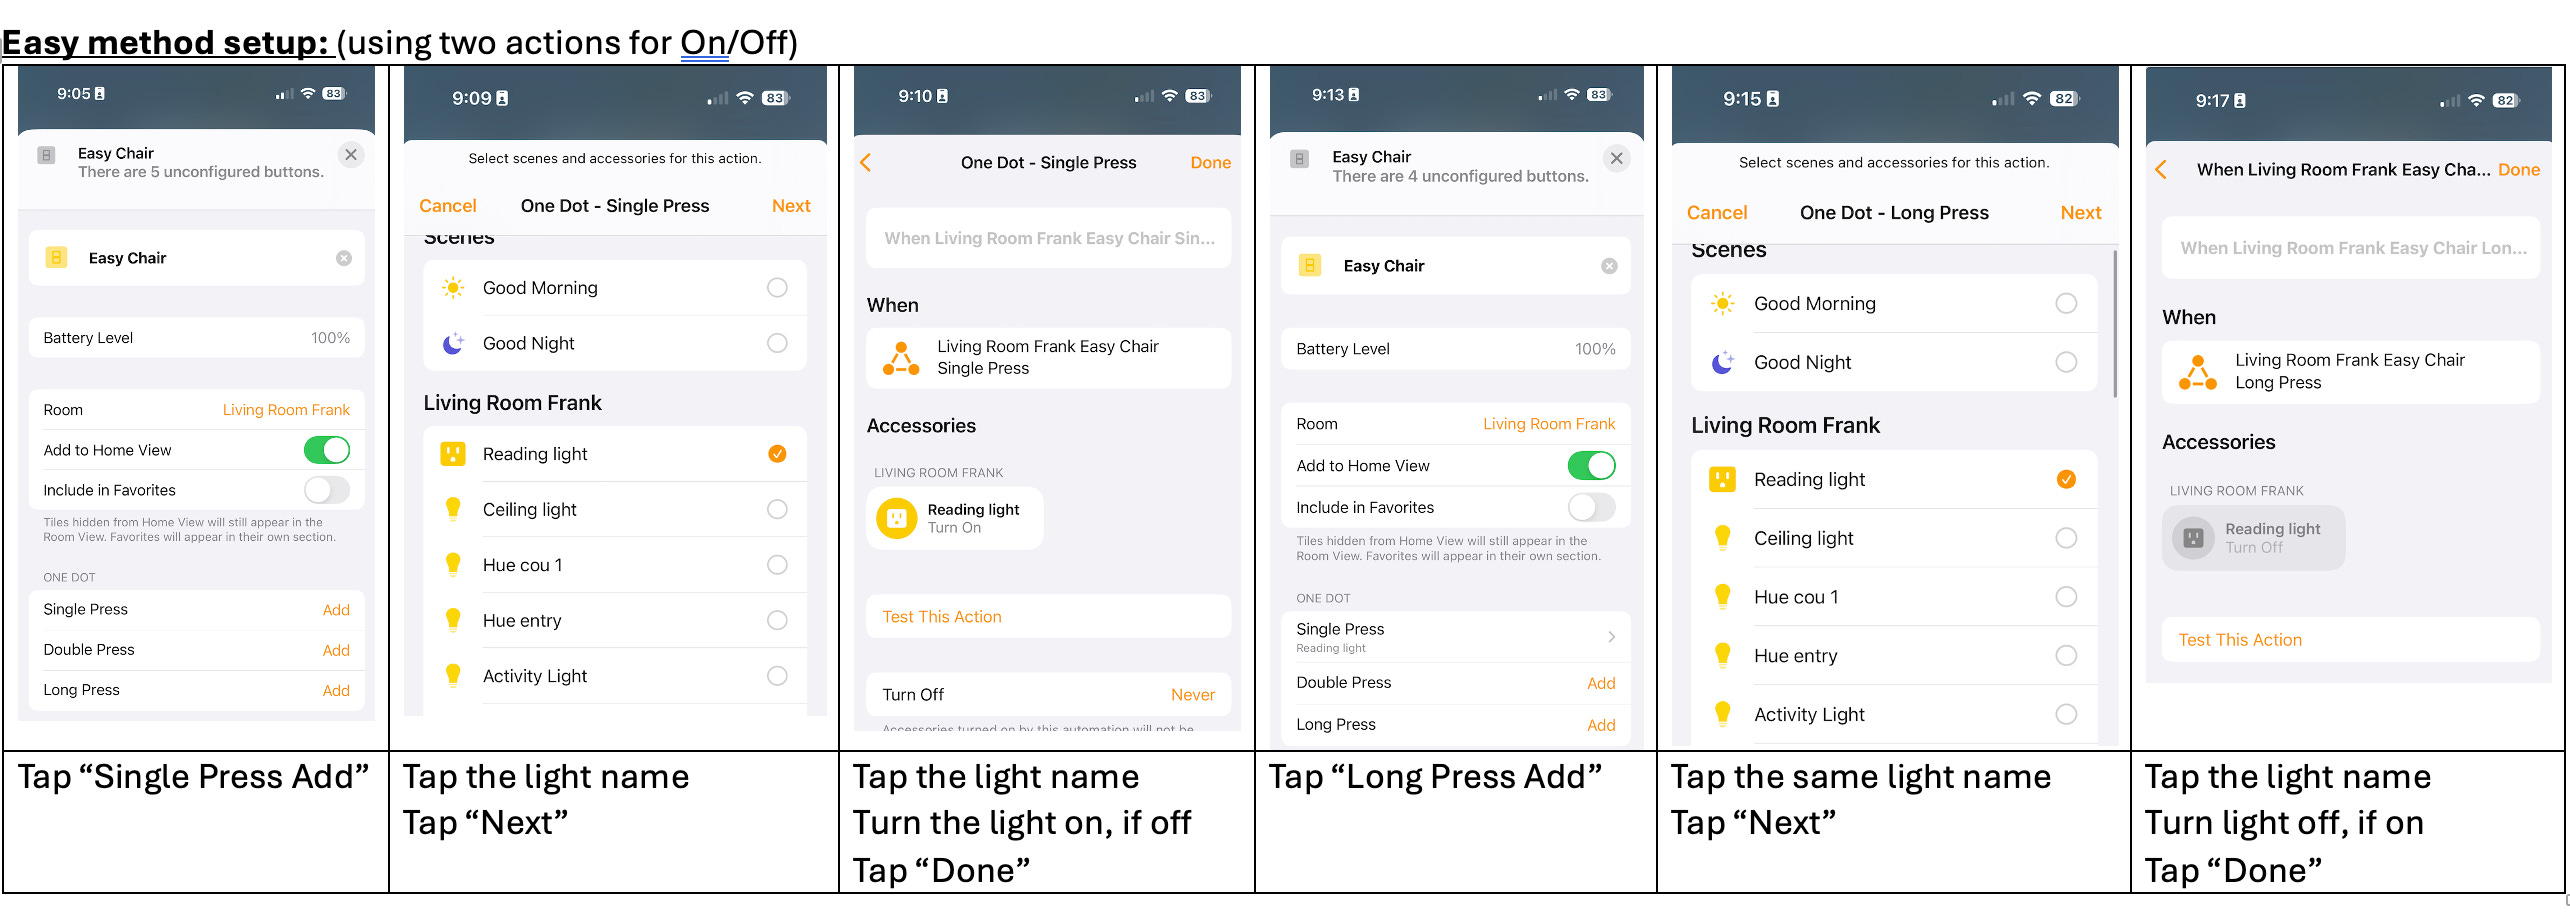
The most straightforward setup is to assign one button action (Single Press) for On and another action (Long Press) for Off. However, since this can confuse casual users, I suggest you use the Toggle setup, which uses a Single Press action for both On and Off.
I will use the Onvis smart button in the following description as I find it more capable, even when used as a single button. The arre button is excellent if you need a smaller size.
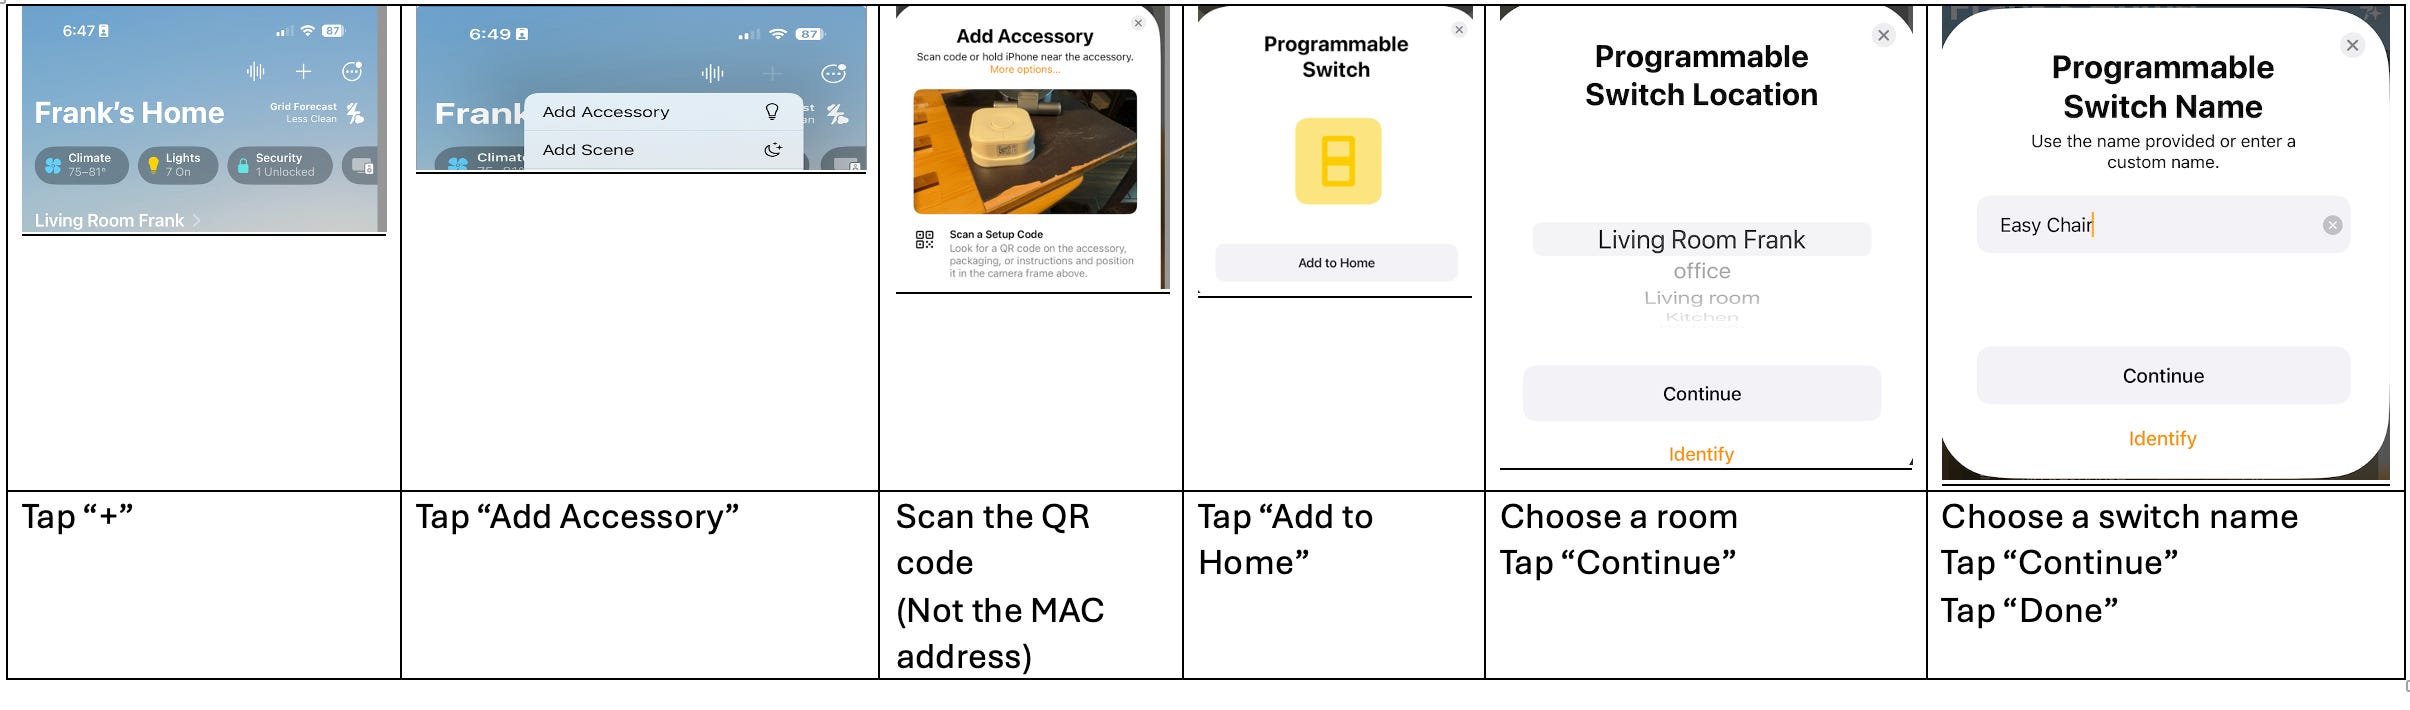
Adding the button to Apple HomeKit
· Remove the back cover of the switch and add the battery
· Enable Bluetooth on your iPhone
o Settings-> Bluetooth (ON)
· Open the Apple Home App
Note: If it fails to connect, perform a Reset by holding the large round button for about 15 seconds until it turns red, green, and blue.
If it still fails to connect, use the Onvis app to troubleshoot
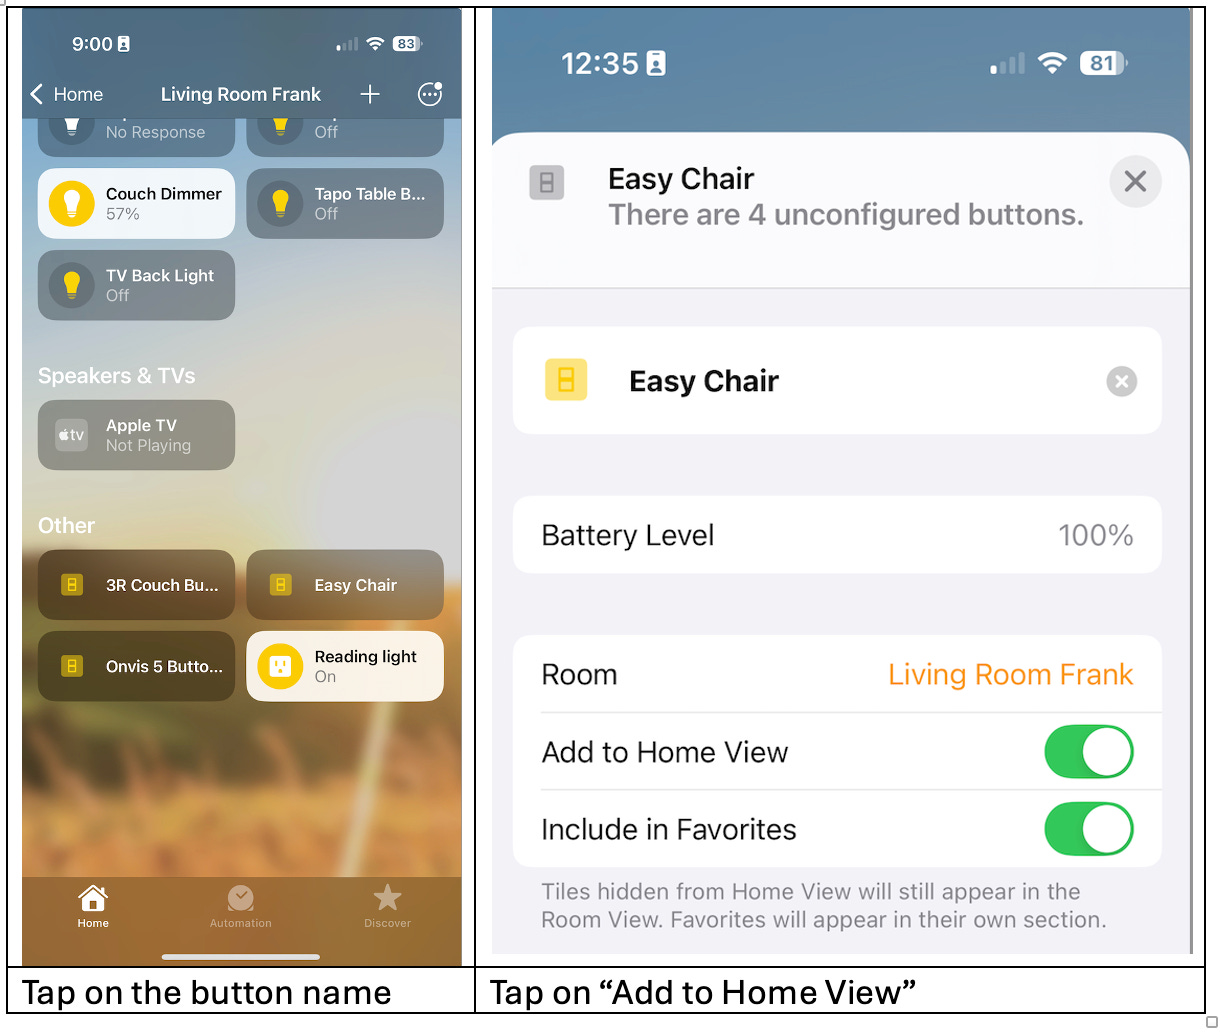
Note: If you are wondering where in Apple Home is that button you just added, tap on the room name and scroll down to “Other”. You may want to make this available in the Home View as follows:
Now that you have the button available in Apple Home, you can choose either the easy method or the toggle button method.
Note: The Onvis buttons have multiple “dots” as identifiers, except for the round middle button which is known as “One Dot”. If this is for a person with low vision, you may want to use the labels or add some “bump dots”.
Testing:
To turn the light on, press the Onvis button briefly. Hold the Onvis button for approximately three seconds to turn the light off.
If this is too confusing, try the Toggle method setup shown below.
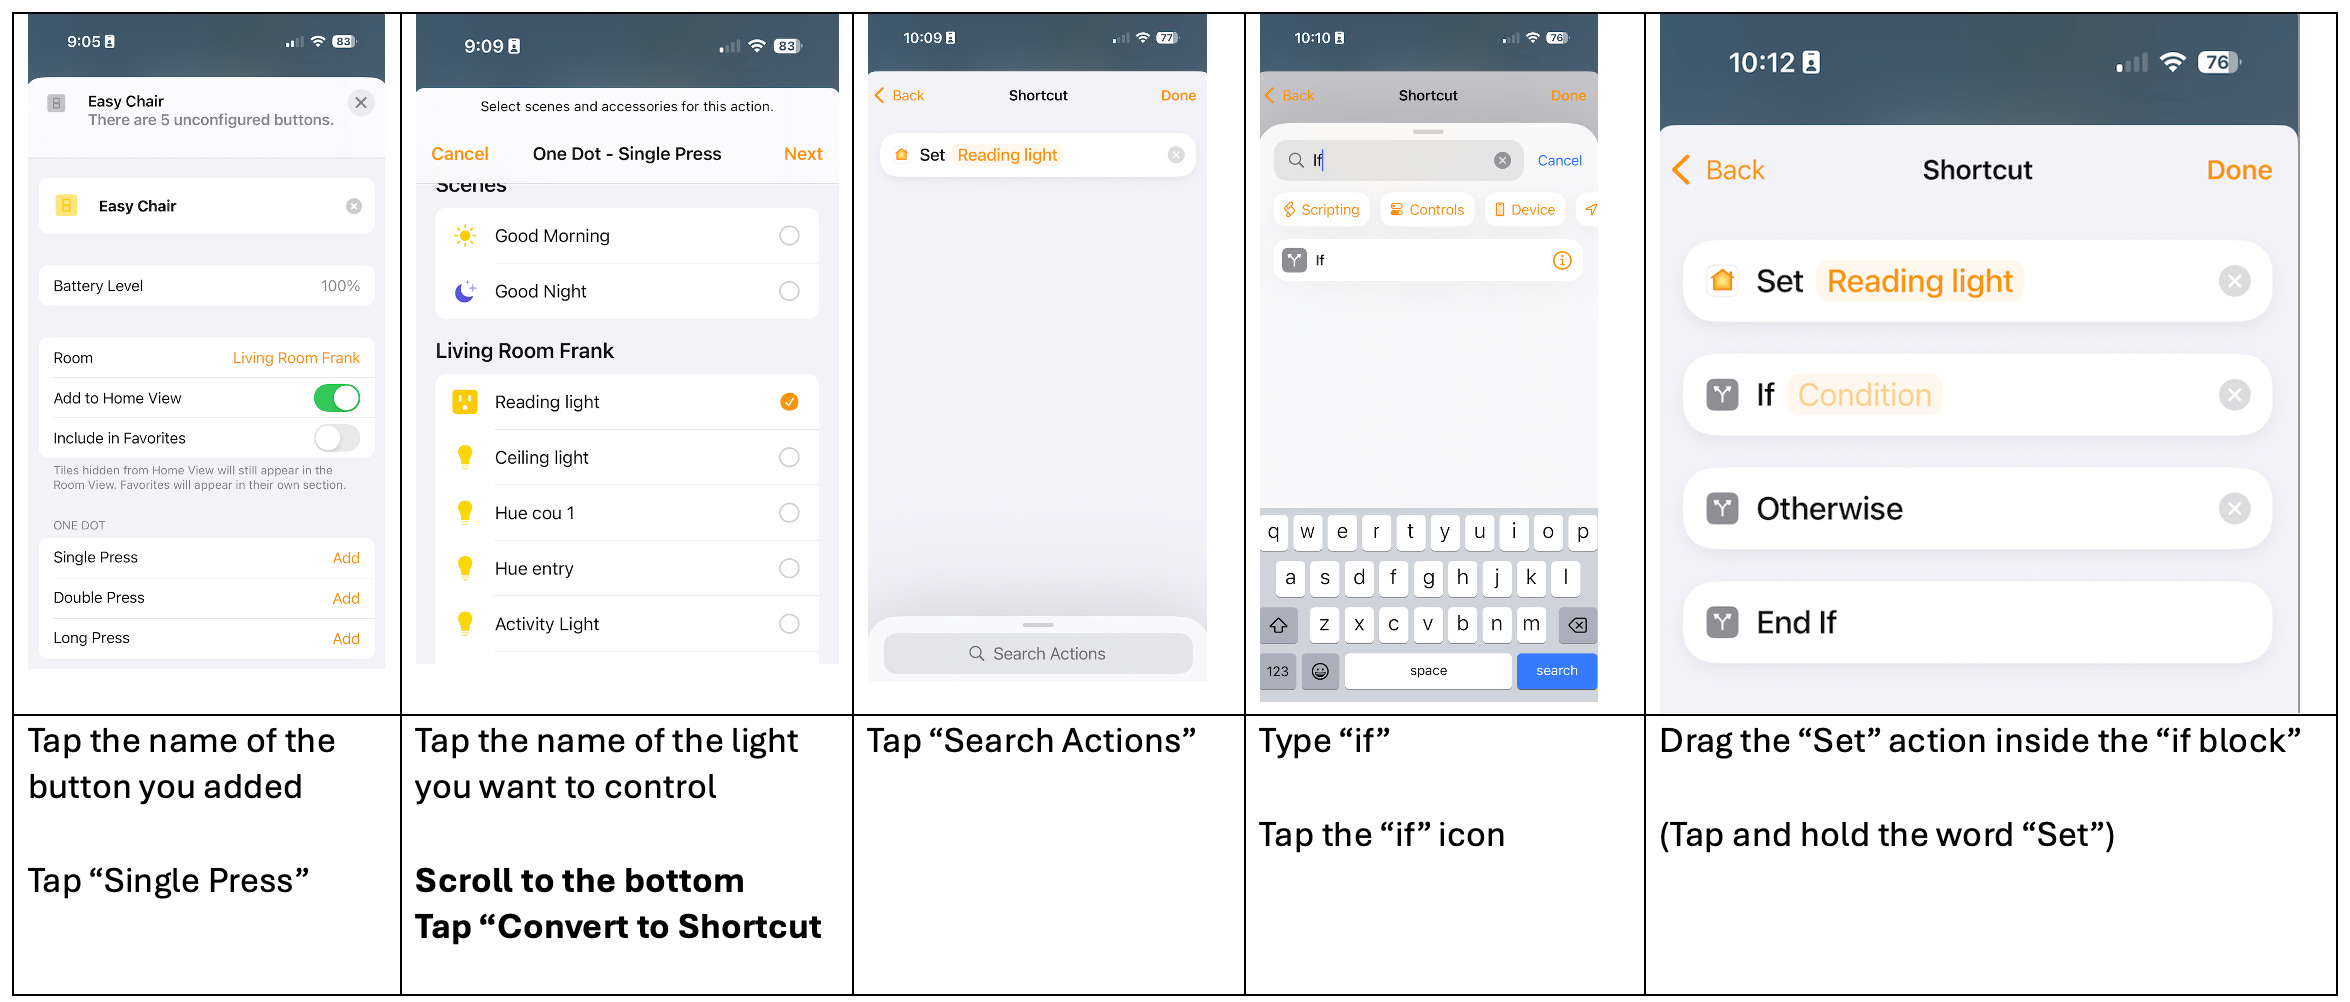
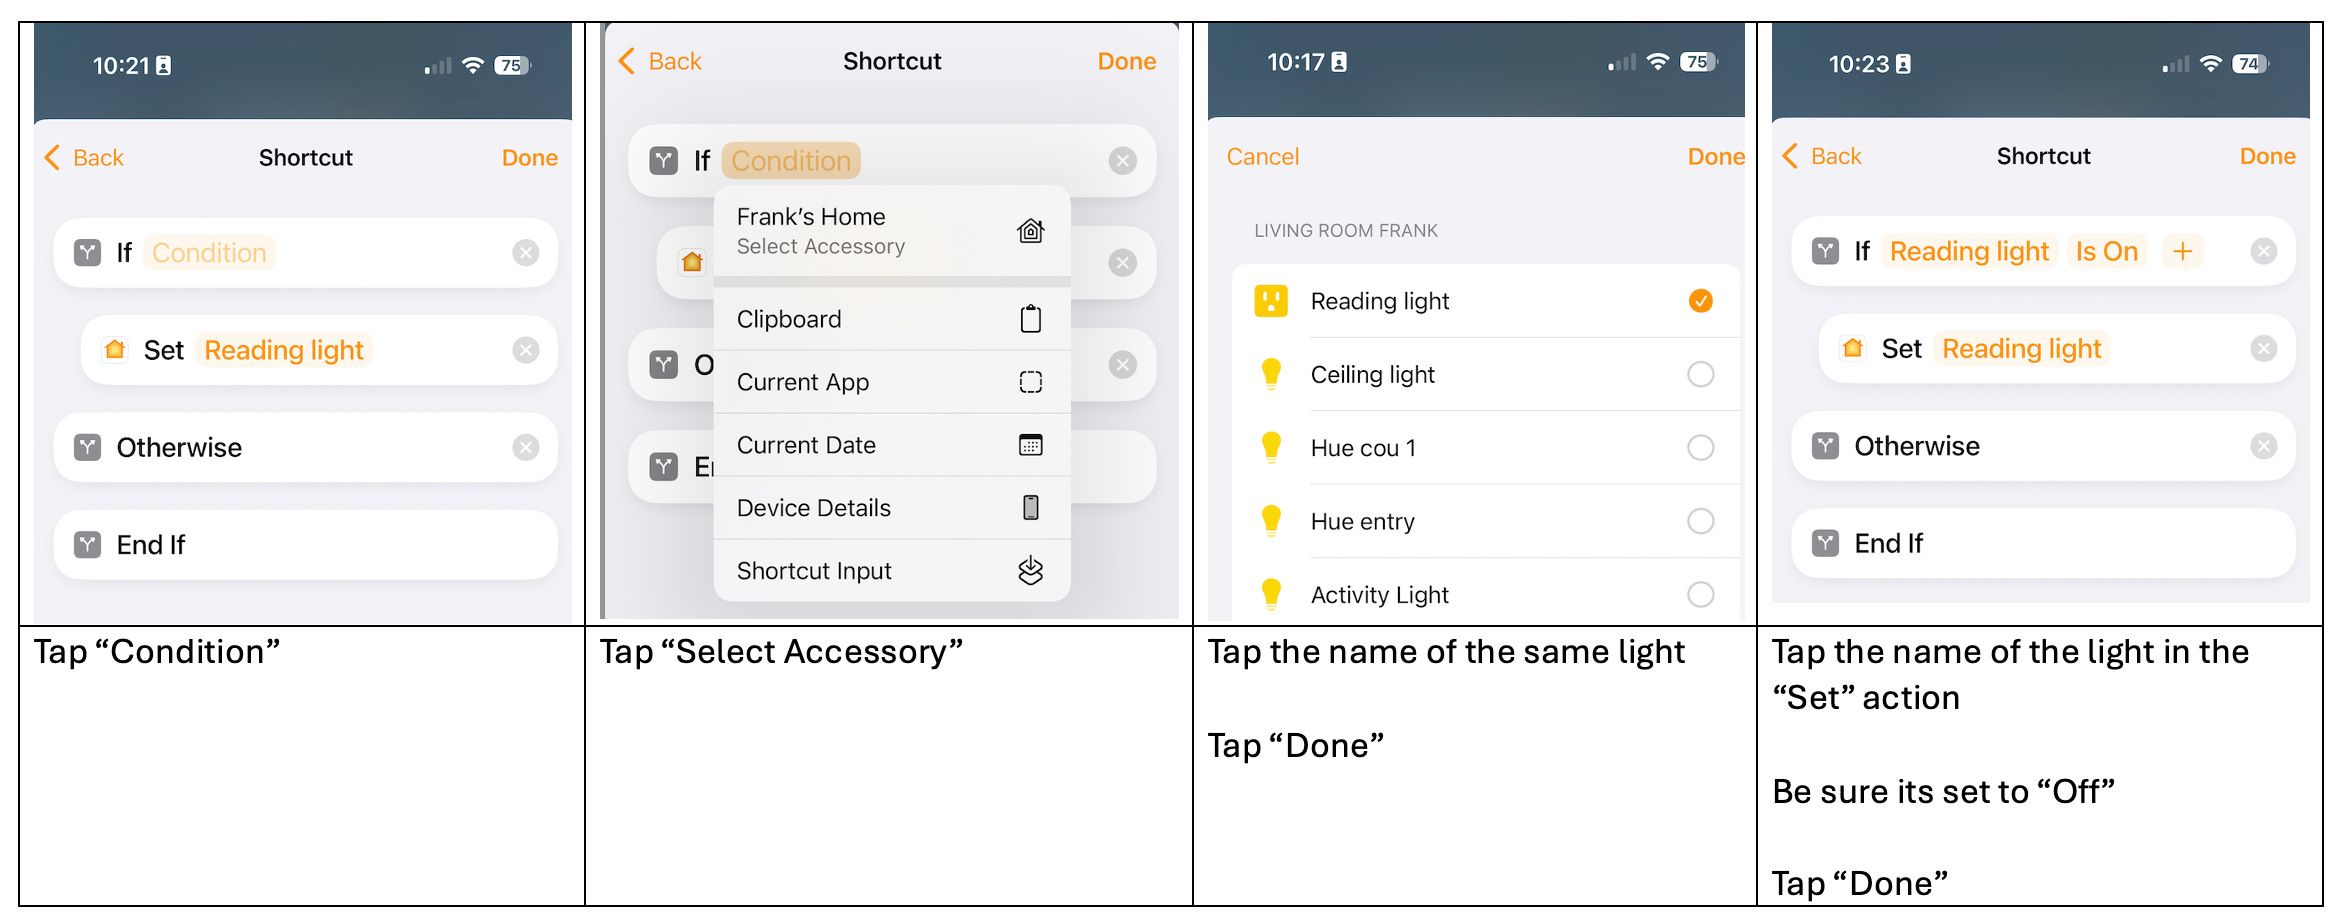
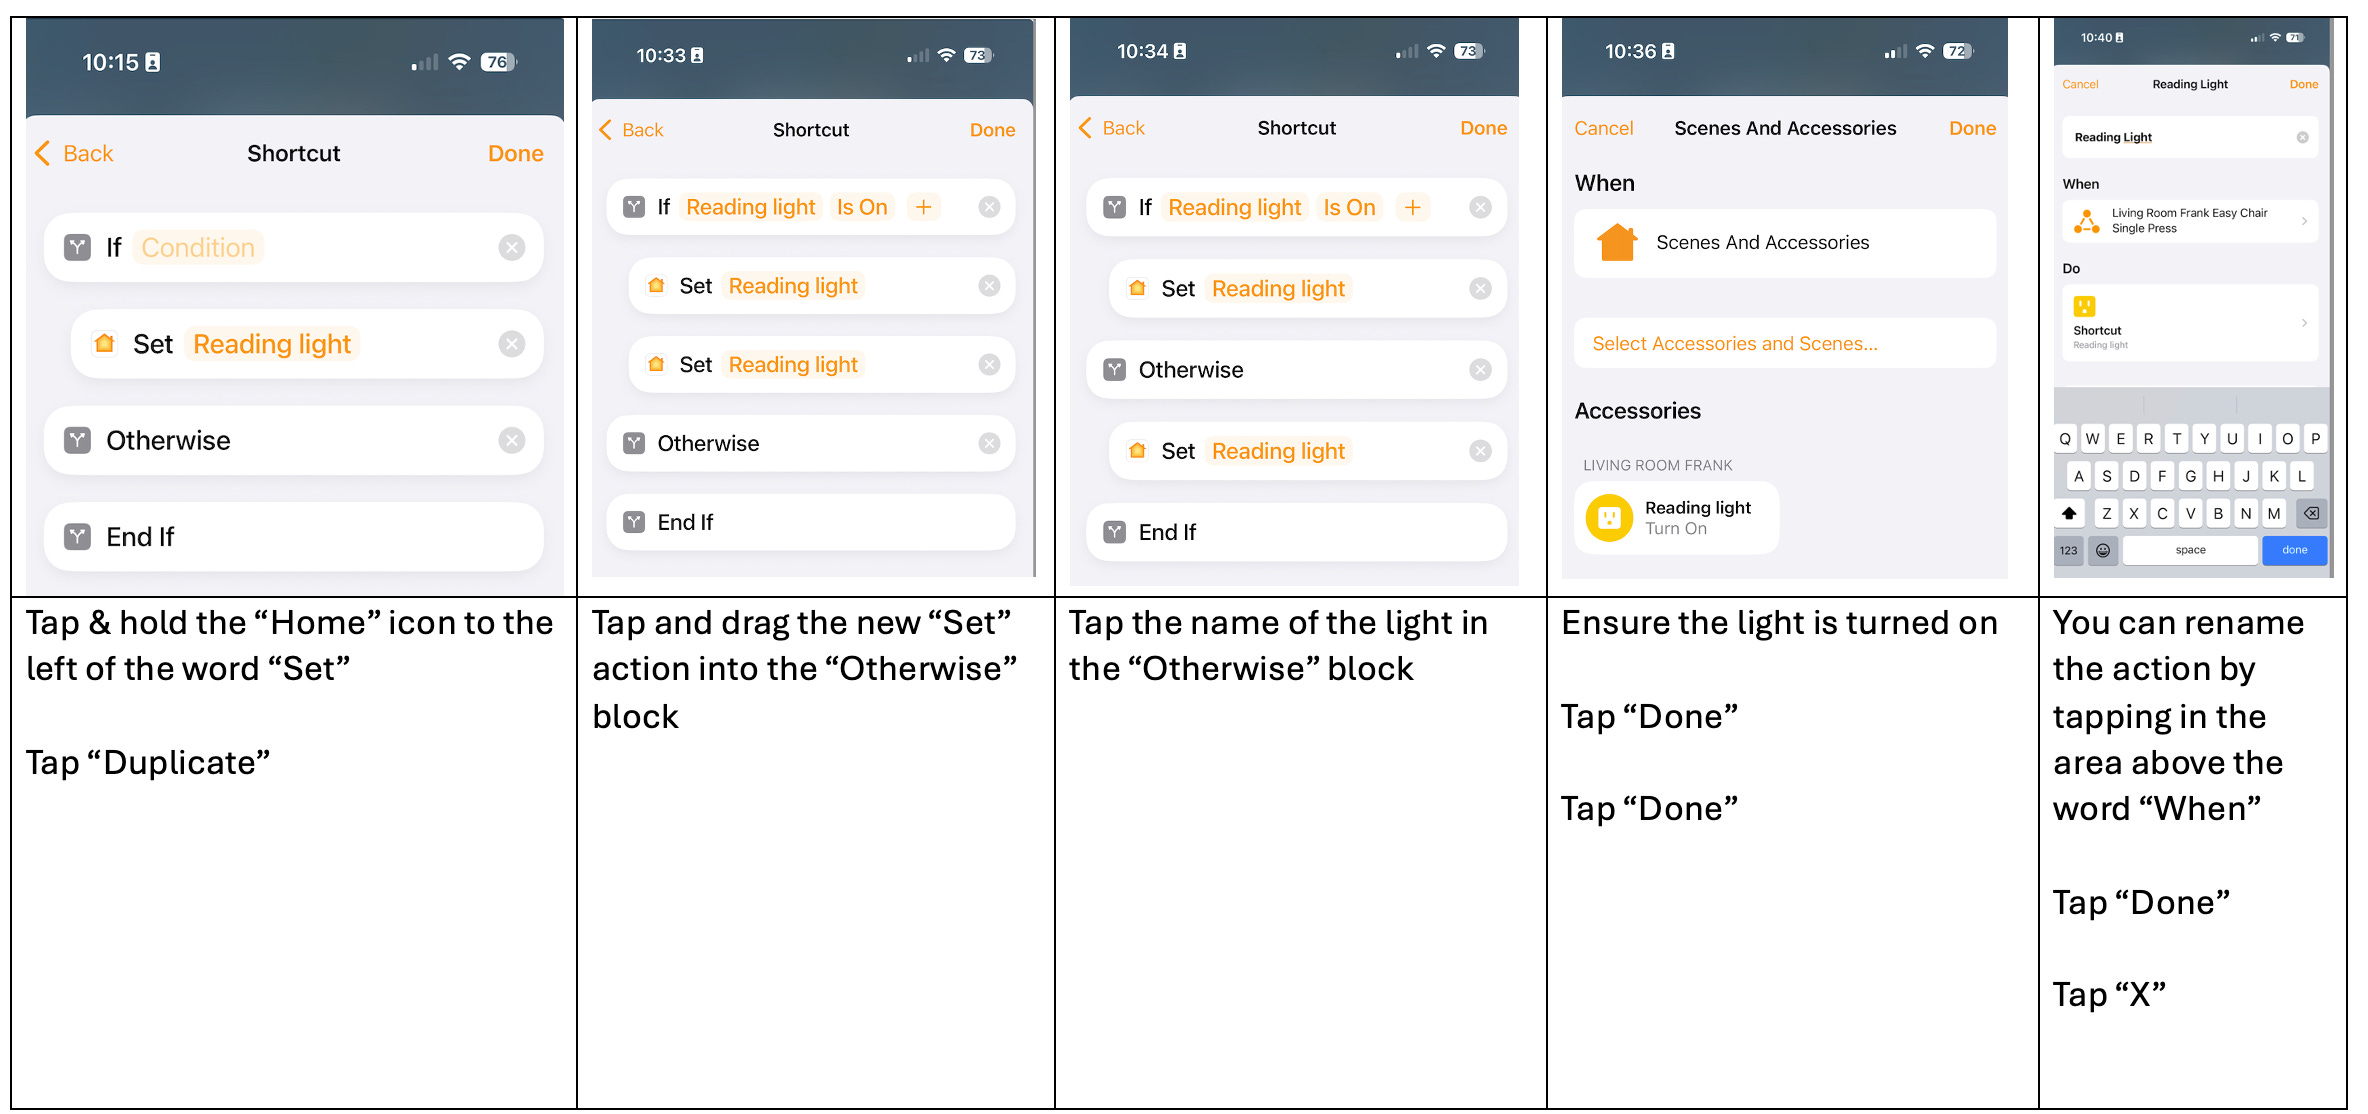
Toggle method setup: (Using a Shortcut for Toggle On/Off- uses a single press)
Testing:
To turn the light on, tap Onvis button. To turn the light off, tap it again.
One use for a button may be as a "call button" for your mom in the bathroom when she needs help getting off the toilet. This could be used to send you a notification on your iPhone.
Bonus:
If you are looking for a way to stop the buttons from sliding around on a non-metallic surface, here are some 3-M backed thin metal plates
One use for a button may be as a "call button" for your mom in the bathroom when she needs help getting off the toilet. This could be used to send you a notification on your iPhone.